
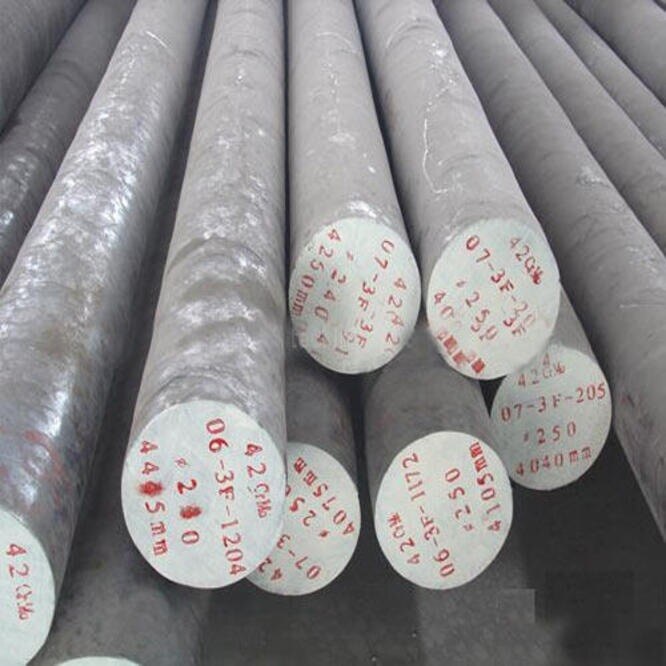
A failed duplex component cannot be diagnosed from a brown surface, a leaking joint, or a single hardness reading. By preserving the failure evidence, separating corrosion from cracking and metallurgical damage, and matching the repair to the verified mechanism, you can decide whether to clean, repair, replace, or redesign the component.
Key takeaways
- Photograph deposits, cracks, welds, and operating conditions before cleaning or cutting.
- Separate corrosion, cracking, erosion, and overload before choosing a repair.
- Combine visual inspection, NDE, and laboratory evidence to confirm the failure mechanism.
- Control weld heat input and interpass temperature to protect duplex microstructure.
Preserve the Failure Evidence Before You Remove the Component
Do not wash, grind, weld, or cut a failed duplex component before recording its condition. A brown or black deposit can be superficial oxidation, chloride-driven corrosion, weld-related attack, or evidence of overheating; removing it can erase the clue that separates these causes.
1. Photograph the component in place, including orientation, flow direction, nearby welds, supports, crevices, deposits, and the exact leak or fracture location. Add a scale and mark clock positions on cylindrical parts.
2. Record operating temperature, pressure, chloride or chemical exposure, flow velocity, shutdown history, time to failure, and any recent cleaning, welding, heat treatment, or process upset. Preserve maintenance and inspection records with the component identity.
3. Isolate the part without dragging tools across the damaged area. Bag loose corrosion products, deposits, and fracture debris separately; label each sample with its location and do not mix material from the parent metal with weld or heat-affected-zone material.
4. Before cleaning, perform close visual examination and map pits, cracks, wall loss, impact marks, and discoloration. Use dye penetrant on accessible surfaces and ultrasonic thickness readings where removal is unavoidable; photograph and retain the results.
5. Mark weld metal, heat-affected zones, repairs, and dissimilar-metal contacts for later examination. Request ferrite measurement, positive material identification, metallography, and deposit analysis before choosing replacement stock.
Treating the event as a generic duplex special metal for problems in service is a diagnostic mistake. Compare the evidence against duplex and super duplex grade, fabrication history, and service temperature; a component exposed near 300–500 °C needs hardness and toughness evidence, not appearance alone.
Separate Corrosion, Cracking, Erosion and Mechanical Overload
A pit, a crack, a worn flow path and a sudden fracture point to different service mechanisms. Do not classify a brown or black mark by colour: superficial oxidation can resemble corrosion-driven section loss. Match the indication to its shape, location, loading and service deposit.
| Mechanism | Indication that supports it | Confirmation and consequence |
|---|---|---|
| Pitting or crevice corrosion | Isolated cavities under deposits, gaskets or stagnant liquid; measurable wall loss | Metallography and chloride analysis; calculate remaining section before machining or welding |
| Stress-corrosion or corrosion-fatigue cracking | Branching, transgranular or multiple surface-breaking cracks near welds, residual stress or hot chlorides | Dye penetrant, suitable ultrasonic testing and fractography; grinding only the visible line can leave a crack tip in service |
| Erosion-corrosion | Directional grooves, thinning at elbows, reducers, impellers or high-velocity zones | Compare flow direction with thickness mapping and analyse deposits; inspect for cavitation damage |
| Mechanical overload | One dominant fracture with little corrosion, deformation, tearing or a fatigue origin at a notch | Fractography, hardness and load review; replacing the grade without correcting the load repeats the failure |
Duplex failures can combine mechanisms. Excess ferrite, intermetallic phases from welding, hydrogen ingress or galvanic contact can turn a small defect into cracking, while super duplex is not immune to hot chloride attack. Examine the weld, heat-affected zone and parent metal; verify ferrite balance and chemical composition before selecting replacement material.
Use Nondestructive Examination and Laboratory Evidence Together
A dye-penetrant indication does not prove chloride stress-corrosion cracking, and a dark deposit does not prove deep corrosion. Confirm the mechanism by matching the inspection pattern with laboratory evidence from the crack, metal, weld zone and service deposit.
Use the examination that can expose the suspected damage:
- Perform close visual inspection and borescope examination for pits, crevices, erosion grooves, deposits, incomplete penetration and galvanic contact.
- Use dye penetrant testing for surface-breaking cracks, ultrasonic testing for wall loss and subsurface flaws, and radiography for selected weld defects.
- Map hardness across the parent metal, weld metal and heat-affected zone. High hardness with reduced impact toughness supports thermal embrittlement more strongly than tensile strength alone.
- Submit samples for metallography, fractography, ferrite measurement, and chemical verification by positive material identification or optical emission spectrometry. Test deposits for chloride, sulfide and other process contaminants.
| Suspected mechanism | Nondestructive clue | Laboratory confirmation |
|---|---|---|
| Pitting or crevice corrosion | Localised wall loss on ultrasonic scans; attack beneath gaskets or deposits | Cross-section metallography and chloride analysis |
| Chloride cracking or corrosion fatigue | Dye penetrant crack network; cracks near stressed welds | Fractography showing brittle branching or fatigue striations |
| Weld-related attack | Indications concentrated in the weld or heat-affected zone | Ferrite balance, nitrogen-related microstructure, and weld-metal chemistry |
| 475 °C embrittlement or intermetallic damage | Hardness rise without obvious surface change | Metallography and impact testing after reviewing service temperature history |
Use the same evidence standard for duplex and super duplex; changing replacement stock without proving the failed mechanism leaves the repair decision untested.
Control Welding and Temperature-Related Microstructural Damage
Do not approve a local weld repair until you know whether heat damage caused the failure. Excessive heat input or interpass temperature can form sigma and chi phases, sharply reducing toughness and corrosion resistance. Excessively rapid cooling can leave excessive ferrite, weakening toughness and corrosion performance. Either condition can make replacement safer than repair.
A qualified welding procedure must control:
- Heat input and interpass temperature, so the heat-affected zone does not form damaging phases.
- Shielding and purge-gas quality, because nitrogen loss, root oxidation, and poor purging can reduce austenite and create a locally inferior weld.
- Filler-metal selection, which must match the duplex grade and service requirement.
- Post-weld cleaning and examination of both weld metal and heat-affected zone, not only the parent forging or plate.
Do not try to reverse sigma or chi damage with local heating. Restoring the intended duplex condition generally requires a complete solution anneal followed by rapid cooling, which can distort a large assembly and alter residual stresses or dimensions.
Super duplex demands even tighter control because its alloying content makes welding, pickling, and contamination control more difficult.
For ferritic duplex exposed for long periods between approximately 300 and 500 °C, investigate 475 °C embrittlement using service-temperature records, hardness mapping, impact testing, and metallography. A normal tensile result does not clear the component. Increased hardness or lost impact toughness supports replacement or full heat treatment rather than a local weld patch.
Choose the Repair, Replacement Grade and Post-Repair Controls
Clean a deposit or corrosion product when the metal remains sound; machine away damage when inspection proves adequate wall thickness and no crack extends beyond the cut. Weld only a qualified procedure can restore the section, because poor purge, nitrogen loss, heat input or interpass temperature can leave the repair weaker than the parent metal.
| Option | What it means | When it applies |
|---|---|---|
| Clean | Remove deposits, scale and contamination, then re-examine | Surface attack is superficial and no measurable wall loss remains |
| Machine | Remove pits, gouges or damaged threads to sound metal | The remaining section meets design thickness and crack examination is negative |
| Weld | Replace lost metal under a qualified duplex procedure | Damage is local, weld access is reliable, and heat-affected-zone examination is possible |
| Replace | Install verified stock with its welding procedure and consumable specified | Cracking, severe thinning, embrittlement, or widespread intermetallic phases exist |
| Reduce operating severity | Lower temperature, chloride concentration, stress, pressure or flow velocity | The component is sound but the service exceeds its grade or design envelope |
| Redesign | Change geometry, isolation, drainage, thickness or material selection | Crevices, galvanic couples, erosion or recurring stress make repair temporary |
Do not select AISI 316 or AISI 316L as automatic substitutes for duplex or super duplex in hot chloride service; 316L suits moderate environments and easier fabrication, but remains vulnerable to localized corrosion and chloride stress-corrosion cracking.
When buying replacement forgings or bar, Steel Mart can provide the material certificate; require phase-balance data, heat treatment, ferrite measurement and mechanical results, not only the grade name.
- Pressure-test and inspect the repair.
- Record weld consumable, purge quality, heat input and interpass temperature.
- Repeat penetrant testing, hardness mapping and ferrite checks where applicable.
- Trend wall thickness and operating chemistry after return to service.
Related products
 | Non Ferrous Metals Duplex Stainless Steel is a high-performance special metal that combines the properties of austenitic and ferritic stainless steels, offering... View product → |
 | Non Ferrous Metals Super Duplex Stainless Steel is a high-performance special metal that combines the benefits of austenitic and ferritic stainless steels. View product → |
Frequently asked questions
What should you do before removing a failed duplex component?
Record its condition first. Photograph deposits, cracks, welds, deformation, component orientation, and service conditions before washing, grinding, welding, or cutting.
How do you distinguish corrosion, cracking, erosion, and mechanical overload?
Compare the damage pattern with operating loads, fluid chemistry, flow conditions, and fracture features. Surface deposits alone do not identify the failure mechanism.
Why combine nondestructive examination with laboratory analysis?
Nondestructive examination maps damage without destroying the component, while laboratory examination can identify fracture features, corrosion products, composition, and microstructural changes.
How can welding damage duplex or super duplex steel?
Excessive heat input, high interpass temperature, or poor thermal control can change the phase balance and reduce corrosion resistance. Apply a qualified welding procedure and record repair temperatures.
When should you compare duplex with AISI 316 or AISI 316L?
Compare the grades against chloride exposure, temperature, strength, weld condition, corrosion resistance, and the documented failure mechanism before selecting a replacement.